3D Printing in Space

The most recent SpaceX mission has just successfully docked a new astronaut capsule with the International Space Station (ISS). The Dragon SpaceX vehicle is demonstrating its ability to carry cargo (eventually astronauts too) to the ISS and return safely to Earth. SpaceX utilised 3D printing technology in order to cut down on costs, weight, and to make the production process more flexible. One of the key engine components - the combustion chamber, was fabricated entirely with 3D printing. Who doesn’t love rockets?


Elon Musk’s privately owned commercial space venture SpaceX – which one day will fly humans to orbit and eventually to the Moon – launched its crew-capable space vehicle this morning for its first demo mission, titled Crew Demo -1. The Crew Dragon took off Saturday, March 2, at around 2.49 am, from Launch Complex 39A (LC-39A) at NASA’s Kennedy Space Center in Florida.

This test flight without crew on board the spacecraft is intended to demonstrate SpaceX’s capabilities to safely and reliably fly astronauts to and from the International Space Station as part of NASA’s Commercial Crew Program. Following the successful stage separation – which once again market a significant milestone in the private space industry – SpaceX landed Falcon 9’s first stage on the “Of Course I Still Love You” droneship, stationed in the Atlantic Ocean.

Crew Dragon, designed from the beginning to be one of the safest human space vehicles ever built, benefits from the flight heritage of the current iteration of Dragon, which restored the United States’ capability to deliver and return significant amounts of cargo to and from the International Space Station. Dragon has completed 16 missions to and from the orbiting laboratory. To support human spaceflight, Crew Dragon features an environmental control and life support system, which provides a comfortable and safe environment for crew members.

Dragon Separation.jpg

The spacecraft is equipped with a highly reliable launch escape system capable of carrying crew to safety at any point during ascent or in the unlikely event of an anomaly on the pad. This system is powered by the Draco Engines, which were among the first rocket engines to be entirely 3D printed. While the crew can take manual control of the spacecraft if necessary, Crew Dragon missions will autonomously dock and undock with the International Space Station. After undocking from the space station and reentering Earth’s atmosphere, Crew Dragon will use an enhanced parachute system to splashdown in the Atlantic Ocean.

On this first test flight, Crew Dragon will transport roughly 400 pounds of crew supplies and equipment to the International Space Station. In addition, the spacecraft will be carrying mass simulators and an anthropomorphic test device (ATD) that is fitted with sensors around the head, neck, and spine to gather data ahead of SpaceX’s second demonstration mission with NASA astronauts on board the spacecraft.

To the Moon and beyond

The Drago vehicle will eventually fly private citizens on a trip around the Moon. Some have already paid a significant deposit for a Moon mission. Space X expects to conduct health and fitness tests, as well as begin initial training later this year. Other flight teams have also expressed strong interest and they expect more to follow. Additional information will be released about the flight teams, contingent upon their approval and confirmation of the health and fitness test results.

NASA’s Commercial Crew Program, which provided most of the funding for Dragon 2 development, is a key enabler for this mission. In addition, this will make use of the Falcon Heavy rocket, which was developed with internal SpaceX funding. Falcon Heavy is due to launch its first test flight this summer and, once successful, will be the most powerful vehicle to reach orbit after the Saturn V moon rocket. At 5 million pounds of liftoff thrust, Falcon Heavy is two-thirds the thrust of Saturn V and more than double the thrust of the next largest launch vehicle currently flying.

Dragon Image.jpg

As part of NASA’s Commercial Crew Program, Space X was initially scheduled to launch its Crew Dragon (Dragon Version 2) spacecraft to the International Space Station in 2018. A subsequent mission with crew was expected to fly in the second quarter of 2018 and may now take place later in 2019.

SpaceX is currently contracted to perform an average of four Dragon 2 missions to the ISS per year, three carrying cargo and one carrying crew. By also flying privately crewed missions, which NASA has encouraged, long-term costs to the government decline and more flight reliability history is gained, benefiting both government and private missions.

Once operational Crew Dragon missions are underway for NASA, SpaceX will launch the private mission on a journey to circumnavigate the moon and return to Earth. Lift-off will be from Kennedy Space Center’s historic Pad 39A near Cape Canaveral – the same launch pad used by the Apollo program for its lunar missions. This presents an opportunity for humans to return to deep space for the first time in 45 years and they will travel faster and further into the Solar System than any before them.

Designed from the beginning to carry humans, the Dragon spacecraft already has a long flight heritage. These missions will build upon that heritage, extending it to deep space mission operations, an important milestone as they work towards their ultimate goal of transporting humans to Mars. As 3ders.org reported in 2015, SpaceX completed the development testing of its SuperDraco rocket engines, which would play a key role in the Launch Abort System (LAS) designed to safely abort astronauts from the crewed Dragon Capsule in the event of a launch failure. During the recent testing at SpaceX’s development facility in Texas, the SuperDraco thrusters were successfully fired 27 times, progressing through various thrust cycles.

Dragon Cockpit.jpg

3D printing to space

SpaceX has been developing the Dragon as a free-flying spacecraft capable of delivering both cargo and people to orbiting destinations. It made history in 2012 when it became the first commercial spacecraft to deliver cargo to the International Space Station (ISS) and safely return cargo to Earth, a feat previously achieved only by governments. Though it currently has only carried cargo to space, SpaceX says that they designed it from the beginning to carry humans, and are currently under an agreement with NASA to develop refinements—including the pivotal LAS system—that would enable the Dragon to safely fly human crewmembers into space.

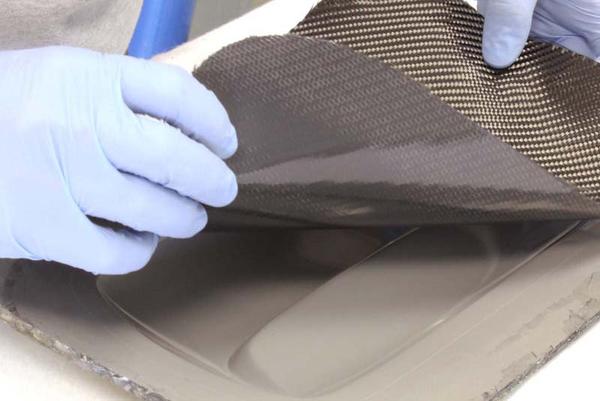
In order to design the SuperDraco engines, SpaceX embraced 3D printing technology in order to cut down on cost, waste, and make the production process more flexible in general. A key component of the rocket engine, known as the combustion chamber, was fabricated entirely with 3D printing on an EOS metal 3D printer. The use of Inconel super alloy ensured superior strength, ductility, fracture resistance and a lower variability in materials properties.

The 3D printed engine is designed to be throttled from 20% to 100% of thrust and can be restarted multiple times. They will be used in the LAS system in order to ensure that the crew capsule can abort a mission safely and either land or splashdown in the event that a launch should fail. However, despite the stringent testing that the SuperDraco’s must undergo, the Dragon spacecraft will also include redundant parachutes to ensure that the crew’s survival doesn’t depend on a single mechanism.

Source: 3D Printing Media Network - https://www.3dprintingmedia.network/spacexs-dragon-spacecraft-with-3d-printed-superdraco-engines-will-take-astronauts-around-moon-in-2018/

Author: Davide Sher

3D Printing Electronics

Some of the most exciting applications of 3D printing are in Bio-printing which we had a blog post on last week. Another area which has huge potential for innovation is the 3D printing of electronic components. A combination of jetting conductive and insulating ink from micro-nozzles allows Israeli company, Nano Dimension, to build whole electronic components in one step. Not only does this have the potential to speed up the process of creating printed circuit boards, it has the potential to change how electronic devices are designed and produced altogether. The electronic connections required for a device can be built into the structural members and negate the requirement for PCB’s altogether. The article below relates to a new patent granted to Nano Dimension in this area.


Israel-based 3D printer manufacturer, Nano Dimension, has been granted a patent for its dielectric ink used for 3D printing electronics. The patent was granted by the United States Patents and Trademark Office and the Korean Intellectual Property Office.

Amit Dror, CEO of Nano Dimension said, “This patent approval is another step in our path to fundamentally change the way electronic parts are made, and add value to design and manufacturing processes.”

Dielectric Materials.jpg

Particles of dielectric nano ink by Nano Dimension. Image via Nano Dimension.

Inkjetting electronics

Nano Dimension is known for its DragonFly Pro 3D printer, a multi-material inkjet system which can 3D print electronics.

In manufacturing electronics using traditional methods, only making an electronic substrate (also known as a wafer) can take up to twenty steps, from drilling vias (electronic connections) to etching and electroplating. In contrast to this, Nano Dimension’s DragonFly can 3D print the whole electronic component in one step, including the conductive and dielectric layers and vias.

The DragonFly uses two print head with micro-nozzles to jet liquid ink onto the build plate. With the help of Nano Dimension’s proprietary AgCite conductive ink and a UV curable dielectric insulation ink, the DragonFly Pro builds the electronic component lay by layer. The printer jets conductive and insulation material simultaneously, and manufactures the whole electronic component in a single step.

Miniature radars

In recent times, the ability of additive manufacturing has opened the doors to miniaturization of electronic equipment such as radars and sensors. Generally, such devices are hefty, which makes them difficult to transport and limit their use in aerospace applications.

In this regard, the DragonFly printer has proved capable of reducing the size of electronics such as multi-layer PCBs, antennas, and sensors. Furthermore, it can 3D print such devices on custom-shaped rigid and flexible materials. A good example of these applications are Nano Dimension’s collaboration with Harris Corporation to 3D print Radio-frequency identification (RFID) chips and with PHYTEC to 3D print PCBs.

On the miniaturization capability of the DragonFly and future potential of Nano Dimension’s technology, Dror added, “Radio frequency circuits such as amplifiers and antennas additively manufactured with our DragonFly Pro will be tested on the International Space Station as part of a joint Harris and Space Florida project.”

“WE ARE VERY EXCITED ABOUT THIS PROJECT AND THE HUGE POTENTIAL IT HAS IN DEVELOPMENT OF INNOVATIVE APPLICATIONS FOR SPACE.”

Source: 3D Printing Industry - https://3dprintingindustry.com/news/nano-dimension-granted-patent-for-dielectric-ink-149841/

Author: Umair Iftikhar

Bio Printing

The useful applications of 3D printing expand far beyond prototyping and manufacturing applications. Additive manufacturing techniques have long been used in medical and healthcare sectors for a variety of uses including surgical planning, training and even production of pills & medicines. Biomedical research applications are often some of the most exciting developments for 3D printing. The article below describes how the National Research Council of Canada (NRC) are teaming up with Aspect Biosystems to develop a model of a blood-brain barrier that will be suitable for in vitro screening with a view to enable more effective medicines for brain diseases and disorders.


The National Research Council of Canada (NRC) and Aspect Biosystems, a Vancouver-based biotechnology company, are collaborating to use bioprinting to study and treat brain diseases.

Tamer Mohamed, Chief Executive Officer, Aspect Biosystems, said, “Our goal is to combine the strength of our microfluidic 3D bioprinting platform with the NRC’s deep expertise in this area to develop a blood-brain barrier model suitable for in vitro screening with a line of sight to commercialisation.

“WE WILL THEREBY ENABLE DRUG DEVELOPERS TO MORE EFFICIENTLY AND EFFECTIVELY DEVELOP LIFE-CHANGING NEUROTHERAPEUTICS FOR A WIDE RANGE OF BRAIN DISEASES AND DISORDERS.”

Bio Printer.jpg

The RX1 bioprinter by Aspect Biosystems will be used in the study. Image via Aspect Biosystems.

Delivering medicine to the brain 

Alzheimer’s, a neurodegenerative disease, is the sixth leading cause of death in the U.S. Currently, approximately 5.7 million Americans suffer from the disease, and it is estimated that this number will reach 14 million by 2050.

One of the causes of Alzheimer’s is dysfunctional blood-brain barrier (BBB). BBB is a microvascular border that regulates the movement of microfluids between blood the Central Nervous System (CNS). It is semipermeable and forms a protective barrier to prevent foreign objects from invading the CNS. But the restrictive nature of the BBB also means that delivery of medication to the CNS is also limited by the blood-brain barrier. Scientists have examined various methods of drug delivery through the BBB.

A different way to study the BBB will be used by National Research Council of Canada. They will mimic the structure of blood-brain barrier with the help of Aspect Biosystems’ bioprinting expertise.

Danica Stanimirovic, Program Lead, Therapeutics Beyond Brain Barriers program, NRC, explained, “By developing ‘living’ models of the blood-brain barrier similar in structure and organization to that of the human brain, we hope to discover novel strategies to deliver therapeutics to the brain, a holy grail of biopharmaceutical sciences.”

“WE ARE EXCITED TO BEGIN THIS MULTIDISCIPLINARY COLLABORATION THAT MARRIES THE EXPERTISE OF THE NRC AND ASPECT BIOSYSTEMS.”

Brain Image.png

A representation of the blood-brain barrier. Image via Elsevier.

Modeling medical treatments

3D printing in biomedical research is paving the way for some of the most pioneering treatment. One of the uses of the technology is the reproduction of highly accurate models of anatomy, which can be used to either study a disease for more research or performing surgery.

Now, NRC will make use of the RX1 bioprinter, acquired through a funding from the Build in Canada Innovation Program, to study life-threatening neurological diseases and develop treatments.

Anna Jezierski, Research Officer, Therapeutics Beyond Brain Barriers program, NRC, said, “A 3D model will allow us to reproduce the cellular diversity of the blood-brain barrier so that we can better understand the possible interactions between the barrier and intended medical treatments, putting us at the forefront of promising new research.”

Nominations for 3D Printing Industry Awards 2019 are open. Choose the best medical applications of 3D printing.

For more information on ground breaking research in biomedicine, subscribe to our 3D printing newsletter. You can also join us on Facebook and Twitter.

We have also have great jobs in the industry on our 3D Printing Jobs site.

Featured image shows the RX1 bioprinter. Image via Aspect Biosystems. 

Source: 3D Printing Industry - https://3dprintingindustry.com/news/aspect-biosystems-and-nrc-canada-collaborate-to-study-brain-diseases-149112/

Author: Umair Iftikhar

Functional, End-Use Parts

3D printing as a technology has been around for decades now but has usually been confined to the realms of visual models, form/fit testing, and rough prototypes. It’s only been in the last few years that machine - and especially materials - development has allowed for the production of functional, end-use parts. This has opened up 3D printing to a huge range of new applications within industry. The article below describes how Lamborghini has made use of Carbon technology to print end-use fuel caps for their Urus model vehicle. Applications like these are just the beginning with printed parts strength, surface finish and ease of production improving all the time.


Carbon will be 3D printing parts for the luxury brand Lamborghini. It is estimated that approximately 1,000 Urus Super SUVs are produced each year, and these will feature two 3D printed components.

The 3D printing unicorn’s additive manufacturing technology will be used to make a textured fuel cap with the Urus label and a clip component for an air duct. Interestingly Carbon tell us that no further post-processing is required and “the fuel cover gets screwed into the rest of the assembly following the print.”


Designing on the means of production

Stefan Gramse, Chief Procurement Officer of Automobili Lamborghini S.p.A said, “Through our extensive procurement research, we found that many of our vehicle components were ideal candidates for digital manufacturing,”

“BY PARTNERING WITH CARBON, WE ARE DESIGNING ON THE MEANS OF PRODUCTION, WHICH ALLOWS US TO PRODUCE MORE DURABLE PRODUCTS SMARTER, FASTER, AND MORE EFFICIENTLY, WHILE ALSO SUBSTANTIALLY ACCELERATING OUR TIME TO MARKET. WE ARE LOOKING FORWARD TO A SUSTAINABLE, SUCCESSFUL PARTNERSHIP WITH CARBON.”

Carbon has not confirmed how many 3D printers Lamborghini will acquire, and does not disclose the location of where manufacturing will take place. However, while the initial production volume of parts appears small there are plans to increase the use of 3D printing at the automotive manufacturer.

Lamborghini Air-Duct

Future 3D printing plans at Volkswagen

The Lamborghini brand, together with other famous names like Porsche and Ducati, is owned by Volkswagen. As previously reported the German parent company is no stranger to additive manufacturing. At Volkswagen’s Autoeuropa plant, Ultimaker 3D printersare used to save the business an estimated $250,000 annually.

Nikolai Reimer, Senior Vice President and Executive Director, of Volkswagen’s Electronic Research Lab, explains that the company is currently “redesigning many of the parts in its vehicle interior, mirror assembly, and accessory components to produce light-weight, durable, end-use parts.” Materials such as Carbon’s durable Epoxy (EPX) 82 material are likely to be beneficial for such applications.

Dr. Joseph DeSimone, CEO and Co-Founder of Carbon said of the partnership, “The automotive industry shows significant promise for using digital fabrication for production at scale, and our partnership with Lamborghini is a perfect example of the kind of innovation you can achieve when you fuse design, manufacturability and engineering all into one.”

While the $200,000 Urus remains out of reach for the majority of the world, 3D printing is increasingly found in more affordable products. You can read more about these consumer applications of 3D printing here.

Lamborghini_Cap

Source: https://3dprintingindustry.com/news/lamborghini-urus-to-feature-3d-printed-components-made-by-carbon-148787/

3D Printing Engineering Materials

Tess Boissonneault wrote the following article last week for 3D Printing Media Network (www.3dprintingmedia.network) about global manufacturing giant Jabil’s efforts to develop engineering grade materials for additive manufacturing. The current driving force behind the implementation of AM technologies in industrial settings is the development of materials; plastics, composites and metals that allow for the next stage of functional applications for 3D printing.


Jabil Additive.jpg

An exclusive interview with John Dulchinos, Vice President of Digital Manufacturing, and Matt Torosian, Director of Product Management, Jabil Additive

Tess Boissonneault January 31, 2019

Last week, global manufacturing company Jabil announced the launch of Jabil Engineered Materials as well as the opening of its new Materials Innovation Center, which will address the development of new industrial materials for additive manufacturing. The announcement shows how Jabil, a $22 billion company with nearly 200,000 employees, is committed to not only the adoption, but also the advancement, of industrial-scale 3D printing.

The company launched its AM division, Jabil Additive, four years ago with the goal of developing solutions for additive manufacturing and to find specific ways to industrialize and leverage the technology to help clients with product development and production. The recent step ahead with AM materials is a turning point in realizing this goal, as Jabil now offers an end-to-end Materials, Processes and Machines (MPM) solution.

To learn more about the launch of Jabil Engineered Materials and the Materials Innovation Center, we recently caught up with two key executives who are driving materials development and AM within the company: John Dulchinos, Vice President, Digital Manufacturing, and Matt Torosian, Director of Product Management, Jabil Additive.

John Dulchinos, Vice President, Digital Manufacturing, Jabil

The materials challenge

“Jabil comes with the pedigree of a very deep manufacturing company,” Dulchinos begins by saying. “Jabil also isn’t a single-industry kind of company; we build solutions across a wide range of industries, from consumer, automotive, aerospace, medical, industrial and so forth. That gives us a really wide perspective on the market, which is important as we think about what we’re trying to accomplish with additive manufacturing.”

Since it launched four years ago, the team at Jabil Additive (which now consists of about 80 people) has been working to systematically address existing constraints associated with 3D printing. One of the biggest limitations, Dulchinos explains, was materials.

“If you think about it, over the last 100 years, materials have been at the forefront of much of the innovation in manufacturing,” he elaborates. “In many cases, new manufacturing processes and new products have been driven by advances in materials science. It’s been an important part of manufacturing.

“When you get to 3D printing, we need to largely recreate much of the work that’s been done in traditional manufacturing processes. To date, there has been a limited amount of work done on materials in large part because 3D printing is still a relatively small industry. So what Jabil is doing is we’ve opened a materials center in Minnesota, a 50,000-square-foot facility whose full charter is to develop engineered materials for additive manufacturing applications.”

50,000 square feet of innovation

The multi-million-dollar facility houses an end-to-end solution for developing, certifying and producing engineered materials for 3D printing. Presently, the facility is operated by a team of about 40 and has received ISO 9001 certification.

“When you look at what it takes to deliver a solution for additive manufacturing, it takes the integration of materials, processes and machines,” Dulchinos continues. “We’ve really been working on this problem for the last four years, and materials is the final piece of the puzzle. You can’t deliver materials adequately without a deep understanding of machines and processes.

Filament Stacks.jpg

“One of the things that is really important to us is working with open platforms. When we think of what constrains the industry, it’s proprietary, closed systems that don’t allow innovation to occur. So our strategy is centered on open platforms and the intersection of materials, machines and processes.”

The launch of the Materials Innovative Facility is expected to spark significant growth for Jabil’s additive manufacturing division. Dulchinos expects it will easily double its business on an annual basis. “Materials have been a huge constraint,” he adds.”The center now gives us the ability to solve problems we couldn’t. We think it will lead to really fast growth in additive for Jabil.”

Engineered materials, customized for you

Matt Torosian, an expert in engineered materials, joined Jabil 18 months ago to help develop new engineered materials for AM and bring them to market. His main mission with the company is to work with customers to develop custom engineered materials for a range of applications.

“What we’re doing is taking basic polymers and adding attributes through fillers, reinforcements and additives, which give the materials new properties like conductivity, higher strength, etc.,” he tells us. “We’re really trying to add customization to the material based on the customer’s requirements without any limitations. Right now, we’re mainly focused on filaments and powders, but we can work with anything in the polymer chain that can be reinforced, made conductive, flame retardant or lubricated.”

Matt Torosian, Director of Product Management, Jabil Additive

Though customer names have not been disclosed, Jabil is already working with a number of partners to develop new material for specific applications in a number of industries. Torosian adds that there are about 300 OEMs that Jabil makes products for in the mobility, automotive, aerospace and medical markets, to name but a few.

The first additive manufacturing materials Jabil has launched are PETg, PETg ESD, TPU 90 A and TPU 90 A ESD—which Torosian refers to as portfolio fillers. The long term goal, of course, is to offer customized materials, and the company expects to launch many more materials over the course of the year.

The first materials will be aimed primarily at jig, fixture and tooling applications. As Torosian explains: “We use a lot of those materials in-house for those applications. We also have several materials that are in various stages of development with customer engagement for applications in aerospace, automotive and medical. We aim to generate a lot of product in the next months and years.”

Emphasizing the rate of material development, Dulchinos adds: “When we get into a steady state, we’ll be introducing dozens of materials a year to market. We’re starting with half a dozen, but there’s a long pipeline of materials behind that will be introduced and tuned to customer requirements.”

Conductive, UV stable, flame retardant

In terms of properties customers are looking for in engineered materials, Jabil Additive has identified a number of trends.

“If you look at the applications side, Matt already mentioned conductive materials, but we also have a number of aerospace and automotive customers looking for flame retardant materials,” Dulchinos says. “Electronics and automotive customers have also been asking for UV stability so that parts can be used in the sun. We have customers looking for lubrication and a number of applications that need reinforcement—whether its glass fiber, carbon fiber or glass-filled.

Jabil Testing.jpg

Article Source: https://www.3dprintingmedia.network/jabil-engineered-materials-interview/

Image Source: https://www,jabil.com

USING 3D PRINTING FOR MAXILLOFACIAL MEDICAL TREATMENT

Recently we've been spending our time reaching out to the medical community in Scotland, trying to understand the needs of the different departments within the medical and dental spheres.

We were pleased to get a call back from Fraser Walker from the Maxillofacial department at the Southern General Hospital in Glasgow. He was really interested in speaking to us and kind enough to invite us in to see what they do. The second I put the phone down, I went straight to Google to ask "What does Maxillofacial mean?". Okay, so I'm not so clued up on the medical jargon... 

Put basically, the British Association of Oral and Maxillofacial Surgeons describe it as:

Oral & Maxillofacial (OMF) Surgeons specialise in the diagnosis and treatment of diseases affecting the mouth, jaws, face and neck.

Fraser Walker is the honorary secretary at the MaxFac laboratory at the Southern General, where they use 3D printing to improve their treatment of maxillofacial patients.

The Southern General Hospital

The Southern General Hospital

pon our arrival, Fraser was extremely friendly and keen to show us all around their lab, explaining to us in detail (without breaching confidentiality, of course) how they've used their Objet 30 3D Printer to produce 3D models for different purposes. The majority of the models they make are full scale, and mostly serve as a reference for planning surgical operations. 

He then introduced us to Micheal O'Neill, an award-winning maxillofacial prosthetist who gracefully granted us some of his valuable time to show us how their CAD workflow happens, from CT scan right through to 3D printed models and final surgical procedure plans. 

Using Materialise's very-high-end Mimics software, they take raw data from a CT scan, and filter it down to exactly what parts and what tissue type they need. This can then be converted into an interactive 3D model.

Materialise's Mimics Software Package - (SOURCE)

Once the 3D model is created, the prosthetist has a range of tools they can use to plan surgical procedures:

  • isolating bone area to be removed
  • design cutting guides
  • using removed bone to find suitable replacement bone to harvest from elsewhere
  • replacing old bone with harvested bone to analyse suitability
  • planning of welded titanium plate to hold the new bone in place

Over the course of such a process, typically more than one 3D printed model will be used to validate the surgical plan, and to communicate with the patient exactly what is going to happen.

Fraser went on to describe how invaluable 3D printing has become as part of their treatment, describing how surgeons have become so reliant on 3D printed reference models that they have almost forgotten that as little as 10 years ago, they had to perform facial re-constructive surgery without them.

As a 3D printing service, the ability to produce models that will potentially reduce surgery time, risk of infection and improve overall results is quite humbling. We will always enjoy making and perfecting aesthetic & functional models, but when you can help to make a difference to someone's quality of life in this way it really illustrates the life changing benefits of 3D printing technology.

PRINT ME A HORSE'S HEAD

It’s not every day that you get a request to 3D print a life-size replica of a horse’s head from a statue, but that’s what happened when Fokus Grupa – an artist collective based in Rijeka, Croatia, contacted us this summer.

Their idea was to create a new art piece based on a 3D scan of an equestrian sculpture which stands in the main square in Zagreb, the picturesque capital of Croatia. A 1:1 replica would require a print standing over a metre tall, a metre deep and 60 cm wide – quite an undertaking when working with printers whose maximum print size is 28.5 x 15.3 x 15.5 cm.

Ban Josip Jelačić Statue: Source

Ban Josip Jelačić Statue: Source

The first challenge for us was the file editing required – the 3D scan of the horse which was provided was of fairly low resolution, which, when scaled to the correct size, leaves holes and gaps between surfaces that need to be repaired. This somewhat tedious task can be made easier with automatic repair tools found in 3D modelling software but there are always issues leftover which require manual editing. With the model fully repaired, the next stage was the gruesome task of ‘slicing’ the horses head into separate blocks which our printers could handle. In order to ensure each individual part would be printable we made each block at least 20mm smaller in each axis – allowing room for the base layer (or raft) which the printers use instead of printing directly onto the build plate.

Horse Ear Repair

Horse Ear Repair

Print Showing Raft

Print Showing Raft

At this stage we had a large patchwork 3D model of a horse’s head to play with. To reduce print time, weight, and ultimately cost, the inner section of the scan was removed to leave a thickened ‘shell’ of the original scan.

Patchwork Horse

Patchwork Horse

Patchwork Horse (Hollow)

Patchwork Horse (Hollow)

With 124 blocks of all different shapes and sizes needing to be printed it was time to go Excel-geek. Each individual block was saved as an .stl file and loaded into our printer software to give us a time and material usage estimation we could use to plan the printing process. Prints ranged from half hour – 6 gram jobs, to 15 hour – 366 gram ones. They were all recorded in our spreadsheet and formatted to show the varying print times. This allowed us to estimate both the amount of filament we would need to order, and a schedule for printing which would make the best use of machine time. So with images of the famous Godfather scene galloping (sorry) through our heads it was time to start printing.

Time Sheet

Time Sheet

arge blocks were printed individually, small ones grouped together to maximise efficiency until we were left with a pile of horse parts waiting to be assembled.

Collection of Blocks

Collection of Blocks

To ensure that all of the blocks had been printed and that they fit together correctly we assembled them using tape. Some of the larger blocks had warped during printing - creating gaps when assembled with neighbouring pieces. This process of 'pre-assembly' allowed us to identify where these gaps appeared, we subsequently split some of the larger blocks into multiple parts to alleviate this problem.  


Pre-assembly

Pre-assembly

With the new blocks printed and pre-assembled we were ready to start fixing them permanently using epoxy resin. Anyone who has ever used epoxy resin before will know that it is a messy and smelly business. Due to the working time of the epoxy each part had to be held in place by hand (curved geometry makes the use of clamps impossible) until the resin had hardened. 

Fixing

Fixing

Bit by bit, the horse's head was taking shape and the unidentifiable blocks (except for our cunning orange marker numbering system) were beginning to make up unmistakeable equestrian features - a mane, nostrils and eventually...ears! 

Building Blocks

Building Blocks

Taking Shape

Taking Shape

Inner Section

Inner Section

To enable us to work on the bottom of the head, we kept the final three layers separate allowing us to flip the whole piece upside-down. The next stage was to fill the gaps between the assembled pieces of our lobotomised horse's head. For this we used a general purpose filler which was quick-drying and easily sand-able.

DSC_0019_medium.png
Filling Gaps

Filling Gaps

ith both sections filled and sanded it was time for the final join and the completion of the horse's head.

Sanding

Sanding

The Mane Attraction

The Mane Attraction

Decimation Detail

Decimation Detail

Totaling 14 Kg of plastic (equivalent to 3.5 miles of ABS filament) and half a Kilogram of epoxy resin, the horse's head was finally ready to be picked up by Iva and Elvis (Fokus Grupa) and transported painstakingly to the exhibition at the Transmission gallery in Glasgow. This project's model was the largest we have undertaken and posed many new challenges. Having said this, it was one that we really enjoyed, and in the end, the result was quite spectacular. After months of e-mail communication and the odd video call it was great to finally meet Iva and Elvis who were kind enough to invite us to the opening of the 'People Love Monuments' exhibition and explain the story behind the series of works presented. 

Print me a horse's head?

Neigh bother.

Provoking Thought

Provoking Thought

Transmission 

Transmission 

A FEW WAYS TO STRENGTHEN 3D PRINTED PARTS

A dead bit

A dead bit

There are some 3D print jobs that require a focus on part strength. We’ve had a few projects in our time that have led us to trying a few different strengthening techniques in order to guarantee that a part will survive when dropped repeatedly or that it will stand up to loading conditions you’re planning to put it under. This study seems to show that there is very little difference in strength between expensive commercial 3D printing machines and low cost desktop machines. All you need is a little bit of time spent thinking and tuning the settings.

This article is a sort of checklist I've put together that’s really more tailored for FDM (or FFF) desktop 3D printers. While sections 1 and 2 deal with steps you can take immediately, sections 3 and 4 require a little bit more preparation and thought.

1.0 MODEL GEOMETRY

Surfaces can be offset then thickened to give stronger thin sections

Surfaces can be offset then thickened to give stronger thin sections

1.1 THICKEN YOUR MODEL

    Starting with the most obvious technique, thin geometry usually produces weak parts. This isn’t helped by the fact that desktop FDM printers struggle to attain a decent quality with thin parts of a print (eg. layer separation, warping and nozzle clash). Think about whether or not it’s possible to thicken the model geometry there. Sometimes it won’t be possible to change the geometry on 1 or 2 planes, but the third plane allows for some added material.

    1.2 SCALE IT UP

    Maybe this is also really obvious, but scaling up the part has the same effect as thickening all the geometry at the same time. Be careful to think about whether or not this will have consequences for any mating parts, or any functional elements of the design.

    Fillets should be added to the bases of thin sections

    Fillets should be added to the bases of thin sections


    1.3 SMOOTH TRANSITIONS WITH FILLETS/ROUNDS & ADD RIBS TO WALLS

    During printing, it’s possible that the nozzles will knock thin parts off the print, causing displacement of the current layer. This makes thin parts even more wobbly. Use fillets, chamfers or blends to allow a sort of lead-in to a thin section, providing a stronger foundation for the thinner section. 


    2.0 LOOK AT YOUR PRINT SETTINGS

    2.1 PRINT ORIENTATION

    Do you have to print it standing up? Part are strongest in the X and Y axes, as the Z axis strength depends a lot on the properties of the layer. Sometimes the best orientation for printing is slanted diagonally, as the layers are usually not perpendicular to the direction of the load points or faces.

    2.2 LAYER HEIGHT

    When you print in smaller layer heights, the plastic is squashed down more, creating more surface area on the X/Y plane. Where the next layer isn't directly on top, a more squashed layer with higher surface area will have a higher contact area with the material. Higher contact area means higher layer adhesion, and the part is less prone to fail under tensile loading in the z axis. This means that a resolution of 100 microns will have stronger inter-layer bonds than the same print at 300 micron layer thickness.

    2.3 INFILL % AND TYPE

    This is another obvious one, but sometimes evades my thought pattern at first.  Changing infill percentage, infill type and occasionally angle can help to strengthen the 3D printed part. We’ve read a bit about how it’s pointless to print anything over 60-70% infill, however we have a client who needs parts done at 100% infill as 75% is not strong enough. One thing to note is that any infill setting above 75% will most likely impact on the outer surface of the part.

    2.4 PERIMETERS/SHELLS OR SHELL THICKNESS

    Following on from infill, another strengthening option is to increase the number of shells or perimeters in the slicing settings. We’ve found that 2 or 3 shells are usually enough, but some applications where loads are high or extremely localised, it may require 4.

    2.5 MATERIAL

    While we prefer to print in ABS 95% of the time, there are a few options for materials on desktop 3D printers - each with different strength properties. While ABS is a strong and flexible plastic, PLA is hard but stiff. Sometimes a flexible material will be stronger or more resistant to shocks, but when geometric stiffness is required, PLA will be better. Remember that though PLA is hard, it is relatively brittle. Where extra durability is required, it is possible to print in Nylon. Taulman 618 is a great nylon filament for FDM printers, although a bit of extra machine setup is usually required.

    3.0 POST-TREATMENT

    3.1 EPOXY OR POLYESTER RESIN

    Something that we’ve looked at recently is resin coating. For purposes when extremely accurate geometry is needed and sharp edges need to be preserved, this technique won’t be right for you. There are many different types of 2 part epoxy resin or polyester resin, each with different material properties and curing properties. Also, there will be a range of viscosities available. Don’t use 2 Part epoxy glue. It won’t work very well and produce a really lumpy finish.

    We use Polyester Clear Casting Resin as it’s thin enough to be spreadable all over intricate parts before it starts to cure. The resin starts to cure about 5 minutes after mixing, and takes about 24 hours to dry. It is also possible to use glass fibre shavings in the resin mix for extra strength, though this may impact on surface finish. The images below show the difference in the part (both parts were painted for a metal effect).

    Before polyester resin coating

    Before polyester resin coating

     After polyester resin coating

     After polyester resin coating

    After resin coating, we drop-tested two of the same model printed on the same printer with the same settings and material. The only reasonable difference was the resin coating. The resin coated part survived with no breakages at all, whereas the untreated part lost 5 or 6 different sections. We're going to continue to use this technique as our go-to strengthening method.

    3.2 CARBON/GLASS FIBRE LAMINATION

    Some parts may be suitable for carbon/glass fibre laminating. This isn't really suitable for intricate parts, as the part surface needs to be entirely wrapped in the fibre mesh; it's particularly suited to parts without holes or gaps. Once the part is wrapped in the fibre mesh, a layer of epoxy or polyester resin is applied over the mesh to solidify it in place. Bear in mind that this will add some extra thickness to the part.

    3.3 HEAT TREATMENT

    Although we've not tested this method, we've heard several reports that placing the part in an oven or using a heat gun/blowtorch to re-melt the outer surface of the plastic creates a stronger inter-layer bond. This sounds like a really dangerous method, as you risk melting the part completely, or distorting/warping certain features. If you're going to try this, start of at a lower temperature (and if using a heat gun, further away from the part then move gradually closer). 

    4.0 MOULD IT (OR MOLD IT, IF YOU'RE AMERICAN)

    Jeshua of 3DTOPO demonstrates his method of "lost PLA" casting

    4.1 PLASTER CASTING PARTS

    Printing off your model in ABS or PLA allows you to mould. Investment (lost wax) casting is possible. To do this, print off your part as is, then cast the part in plaster of paris. You can then remove the original plastic print by heating the plaster cast in a furnace above 230C. You can then pour molten metal or plastic to into the mould cavity and let it settle. To remove to final cast part, the mould is destroyed with a hammer and the excess plaster is washed off. Something to bear in mind when experimenting with this method is that there will be some shrinkage of the part, so you'll need to scale the mould pattern up by 2-3%.

    4.2 ROTO-MOULDING PARTS

      An alternative to casting parts, a plaster or silicone mould can be used for rotational moulding. The strength advantage of using roto-moulding to create hollow parts lies in the lack of build layers, and a single crystalline structure for the whole part as it cools as one.

      By pouring molten plastic/metal into the mould cavity, closing the mould and continuously rotating it on 2 axes, a hollow part can be achieved. There are numerous small/desktop roto-moulding machines available to buy, or you could build your own. The most common type of desktop roto-moulder consists of a central horizontal spinning X-axis to which is mounted a frame that spins on the Y or Z axis (rotates between them according to the X-axis). Usually they run off a single motor that control both axis via a gearing or pulley system. Each different mould shape will take some experimenting with rotation speed to ensure the molten plastic is spread over all the surfaces.

      Source: StudioMyFirst

      Source: StudioMyFirst